Vasja Veber
Nov 12, 2026

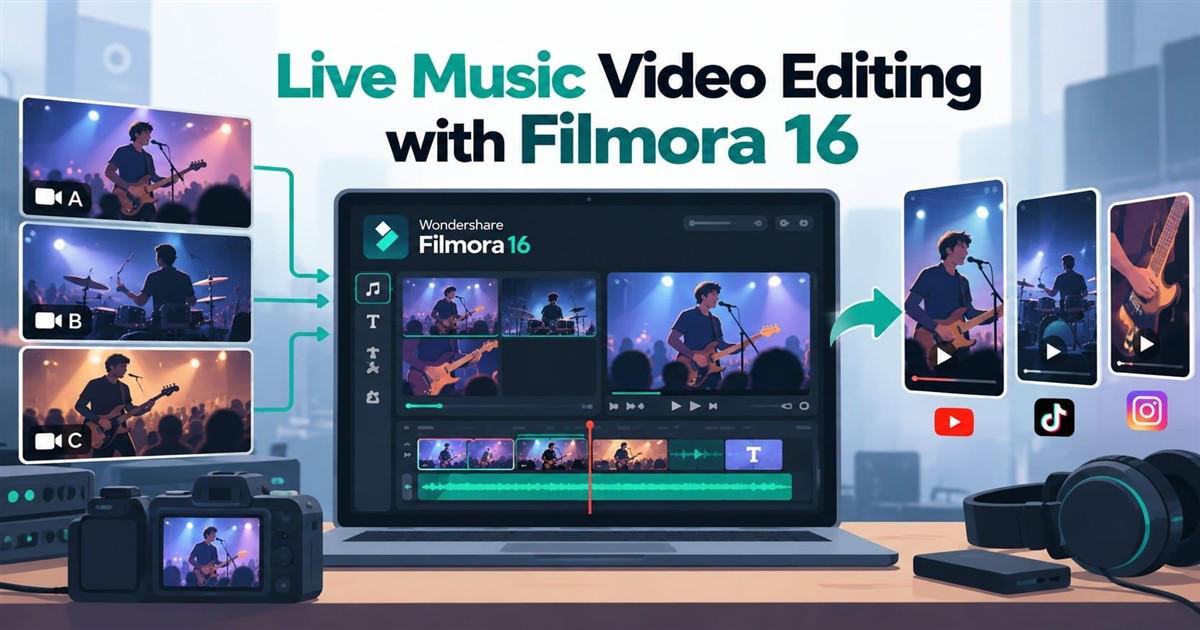

After a club show, an independent singer-songwriter has one song recorded from 3 camera angles, along with a clean audio feed from the mixing desk. However, the footage consists of 3 long recordings of the entire set, none of which are ready to share. By editing this performance, she can create a full music video and 3 short promotional clips to promote her new single.
To create these videos, start by editing the complete performance before moving on to shorter promotional clips. With version 16, the Filmora AI video editor makes the process easier through multicam editing for smooth camera switching and Auto Reframe for vertical videos.
Before editing, define a clear promotional goal for each video, whether introducing a new song, highlighting a live performance, or promoting an upcoming show. For the single “Northbound,” these goals are divided across 4 videos. The following table outlines each video's key message and intended audience action:
Video | Key Message | Next Step |
|---|---|---|
Full Performance (4 Minutes 30 Seconds) | Introduces “Northbound” through its complete live performance. | Stream the studio version. |
Chorus Short (30 Seconds) | Highlights the crowd singing along to the song's chorus. | Watch the full performance. |
Guitar Solo Short (25 Seconds) | Showcases unique live moments not featured in the studio recording. | Subscribe for more live clips. |
Next-Show Short (20 Seconds) | Promotes the band's upcoming performance at Riverside Hall on May 16. | Buy tickets through the profile link. |
Note: Each video should focus on a single message and call to action. Asking viewers to stream, watch, and buy tickets simultaneously can reduce engagement and distract from the main promotional goal.
All 4 videos use footage from the same live performance of “Northbound.” Before editing, complete these 3 essential preparation steps:
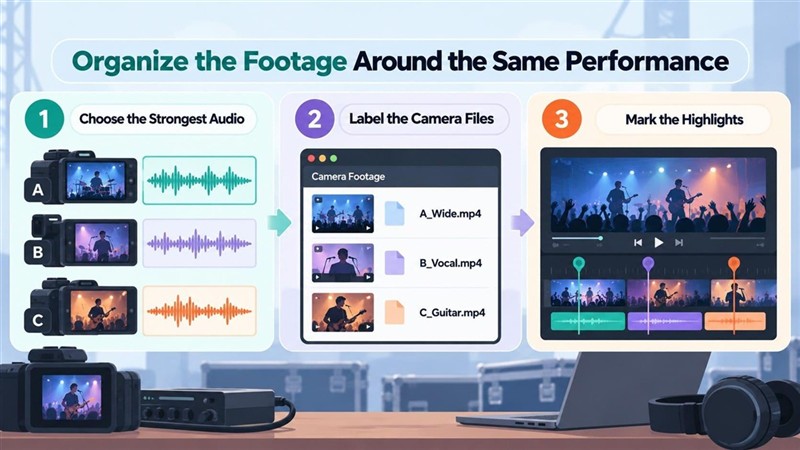
Choose the Strongest Audio: Compare the separately recorded mixing-desk feed with the phone mic on B and the camera mic on C. Use the clean desk recording as the main audio source for every video.
Label the Camera Files: Rename each file before importing, using labels such as “A_Wide,” “B_Vocal,” and “C_Guitar.” These names help you quickly identify camera angles during multicam editing.
Mark the Highlights: Note the timestamps of key moments, including the final chorus with crowd participation, the guitar solo, and the stage banter announcing the next show.
Labels and timestamps help organize the footage, but all 3 camera angles must be synchronized before switching between them. The music video editing with Filmora guide highlights “Auto Synchronization” under “Sync Your Clips” to fix audio and video sync issues. This feature helps align recordings using matching audio waveforms, including audio captured separately from the mixing desk.
Tip: For future performances, keep the resolution, frame rate, and color settings as consistent as possible across all cameras to ensure smoother multicam editing.
Filmora’s Multicam editing feature synchronizes footage from different cameras and allows seamless switching between angles during playback. With support for up to 16 camera angles, Filmora 16 easily handles the 3-angle performance of “Northbound.” Follow these 5 steps to create a complete live performance video:
Create the Clip: Select the 3 camera files in the media bin, right-click, and choose “Create Multi-Camera Clip.” Enter “Northbound Live” as the clip name.
Sync by Audio: Under "Synchronization Method," select "Audio" to align the 3 camera angles using their recorded sound. Click "OK" to create the multi-camera clip, then drag it to the timeline.
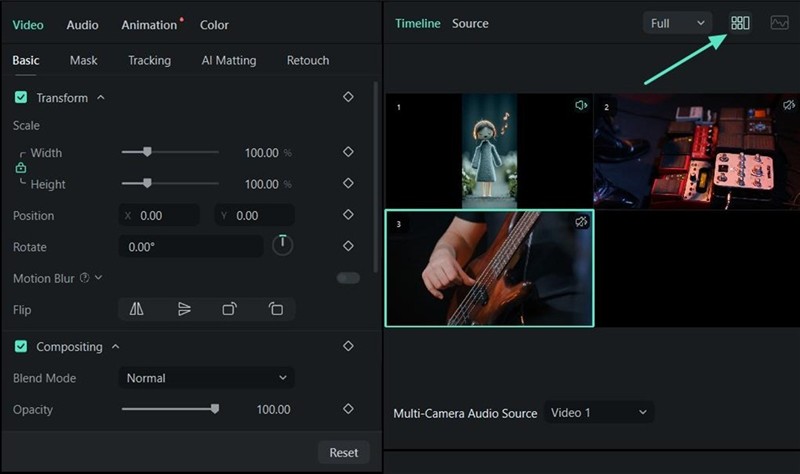
Set the Audio Angle: Open "Multi-Camera Audio Source" in the preview window and select the preferred camera audio. Alternatively, right-click the multi-camera clip and choose "Switch Multi-Camera Audio Angle" to change the audio source.
Switch While It Plays: Enable “Switch Multi-Camera View” to display the camera angles in the preview window.
Check the Sync: Review snare hits and the singer’s lip movements at the beginning, middle, and end. If an angle drifts out of sync, right-click the clip and choose “Edit Multi-Camera Timeline” to adjust its position.
Once the full performance video is ready, you can use its highlights to create shorter promotional clips. Each clip should follow the song’s natural rhythm and musical phrases rather than strict time limits. The following table compares 2 approaches to editing a chorus short, highlighting how proper timing preserves the musical impact:
Poorly Timed Cut | Well-Timed Cut |
|---|---|
Starts 2 words into the chorus, missing its opening. | Starts with the drum fill 1 bar before the chorus begins. |
Ends abruptly while the final note is still ringing. | Ends 2 seconds after the final note, capturing the crowd’s cheer. |
Switches to a wide shot during the high note. | Holds camera B’s close-up throughout the 3-second high note. |
Places the song title over the guitarist’s hands, hiding important details. | Displays “Northbound, Live at The Lantern” in the upper portion without covering the performance. |
Keep about 1 second of ambient crowd sound at the beginning and end to maintain the live atmosphere. Place short text overlays, such as the song title and venue, above the performers without covering important visuals. Once the horizontal clips are ready, adapt the chorus short for vertical viewing on social media platforms.
With the chorus short ready, the next step is to optimize it for vertical viewing on smartphones. Filmora’s Auto Reframe converts 16:9 footage into a 9:16 format while automatically keeping the main subject in focus. Follow these 3 steps to create a vertical music promo clip:
Reframe the Chorus Short
Export the chorus short without its title to prevent text from getting cropped. From Filmora's start screen, open “Toolbox > Auto Reframe” and import the exported clip. Set “Aspect Ratio” to “9:16” and click “Analyze.” Review the automatic framing, especially in wide shots featuring multiple musicians.
Review Shots with Multiple Musicians
Wide shots featuring 3 musicians can lose important details when converted to a vertical format. Play the reframed video and check whether the camera follows the intended performer. Pay attention to moments when the frame shifts toward the drummer or cuts off the guitarist's instrument.
Adjust the Framing Manually
If Auto Reframe focuses on the wrong musician, adjust the framing box in the preview to keep the singer visible. Export the vertical clip, then import it into a new “9:16” project to add the song title. Position text away from the bottom and right edges to avoid overlapping with Reels and Shorts interface elements.
With all 4 videos ready, the next step is to publish each one on the right platform and track its performance. The following table outlines where to share each video and which metrics to monitor to measure its promotional success:
Video | Destination and Performance Metrics |
|---|---|
Full Performance | Publish on YouTube with a link to the studio version in the description. Track views in YouTube Analytics and monitor “Northbound” streams in Spotify for Artists. |
Chorus Short | Publish as a YouTube Short with a “Related Video” link to the full performance. Monitor the full video's views and traffic from Shorts. |
Solo Short | Share as a YouTube Short to attract new viewers. Track subscribers gained through YouTube Analytics. |
Next-Show Short | Publish as a YouTube Short directing viewers to the ticket link in the channel profile. Track ticket-link clicks and sales where analytics are available. |
An increase in streams after publishing a short does not necessarily mean the video caused it. Spotify for Artists separates “Source of Streams” into active sources, such as “Artist profile and catalog,” and programmed sources, including “Editorial and personalized editorial playlists.” A rise in editorial streams suggests playlist exposure contributed to the increase. Even when active streams grow, the timing alone cannot prove that the short drove those plays.
Note: YouTube Shorts' “Related Video” feature requires advanced feature access. Eligible Official Artist Channels can also display a Bandsintown ticket shelf beneath videos on desktop when qualifying events are available.
Turning live performance footage into effective music promo videos starts with editing around the music. Well-timed cuts, uninterrupted high notes, and consistent desk audio help preserve the live experience. Using matching titles and framing across all 4 videos creates a consistent promotional campaign. If your last show was recorded from multiple angles, try this Filmora 16 workflow with one song before editing the entire performance.
Source of music data: Viberate.com
-
📌 Viberate - Music Intelligence is the data & AI layer behind music analytics, connecting artist discovery, audiences, playlists, tracks, Spotify, TikTok, YouTube, streaming, and radio airplay.
 Next article
 Previous article

11M+ artists, 100M+ songs, 12M+ playlists, 6K+ festivals and 100K+ labels on one platform, built for industry professionals.